PuTTY: Exporting Profile Data for migration

0 votes, 0.00 avg. rating (0% score)

I was using the PuTTY with several profiles stored and was happy with it. One day, I got this new labtop and decided to migrate whole desktop system to this new labtop.

But for PuTTY,there was no menu for the profile export. So I spent some time to find out how to do it.

The solution was posted in the FAQ of the PuTTY Homepage.

A.5.2 Where does PuTTY store its data?

On Windows, PuTTY stores most of its data (saved sessions, SSH host keys) in the Registry. The precise location is

HKEY_CURRENT_USER\Software\SimonTatham\PuTTY

Alright, you can extract Registry data by using regedit. Open regedit and browse the path in the left treeview upto HKEY_CURRENT_USER\Software\SimonTatham\PuTTY

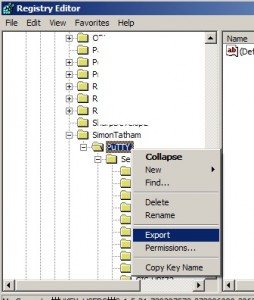
Once you highlight the PuTTY node, click right mouse button and select the ‘Export’ Menu. A new Save Dialog window will be shown and you will be able to save the information into a file.

Export PuTTY Profile data from the Registry

After you copy the data file (*.reg) to the new computer, you can register it to registry by simply double clicking on the file.

Updated : 20070629
Here is a better way to do it

Create a batch file that executes regedit.

regedit /ea putty.reg HKEY_CURRENT_USER\Software\SimonTatham\PuTTY

Run it by double clicking. Then you will get putty.reg.
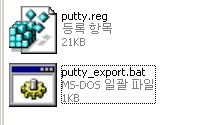
Then you can send it to your Gmail account and download the file from any other computer connected to the Internet and import it by double clicking again.

And here is the batch file if you are lazy enough to download one instead of creating one by yourself.
http://www.neox.net/w/wp-content/data/putty_export.bat
Read More

PuTTY : A Free Telnet/SSH Client

0 votes, 0.00 avg. rating (0% score)

They used to charge high prices for the commercial SSH client software.(SecureCRT is one of them) Then this free SSH client was released in the Internet. And we are able to enjoy secure shell environment for free! Thanks to Simon Tatham. Below is the excerpt from the PuTTY homepage.

PuTTY is a free implementation of Telnet and SSH for Win32 and Unix platforms, along with an xterm terminal emulator. It is written and maintained primarily by Simon Tatham.

If you are a developer or a system admin , you may access to the UNIX server using telnet application everyday. Telnet uses a simple raw data transmission without encryption , so if you use telnet over the public Internet, your authentication data(Password) may be captured and viewed by anyone with the right tool and the motivation. It is very vulnerable and not recommended.

SSH (Secure Shell) is similar to telnet but it is very secure. It encrypts the data before the transmission, so you can rest knowing that your password is safe with you.

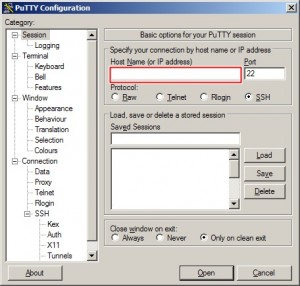
PuTTY first screen

When you first run the application, you will see the screen looks like above image. You can right connect to the SSH server right away by typing in the IP or domain name of the host in the HOSTNAME field and press Enter key.

There are various options and settings that you can change by using the items in the left pane. (Windows Color, Font size)

There are few settings that you may want to change before starting a session.
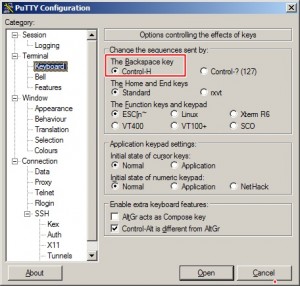
1. Backspace Key: By default, Control-?(127) is the Backspace key, but you may need to set to Control-H.(It depends on the server’s setting).
Changing Backspace Key value

(more…)

Read More